Storing My Lego® Bricks
A problem for all of you with LOTS of blocks!
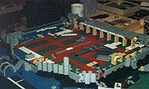
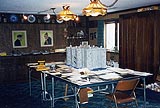
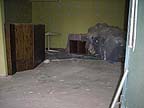
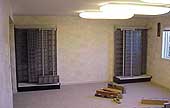
1. Tiring of your old system? Like many of you, storing and finding your Lego bricks gets to be an increasing problem as your collection grows. While I did not take "before" pictures of my "mess" in the rec room, I have located several old pictures that show some of the clutter and the array of different containers I used to store bricks in. Projects were occasionally delayed while I searched through box after box and cannister after cannister, looking for a part! The old green Sears pingpong table was sagging from age and the weight of increasingly large castles, making building more problematic. Something had to give.

|
|
|
|
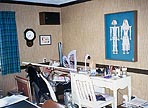
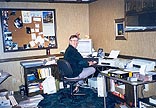
2. Then the time finally came to redo the basement. Seredipitously, our 26 year old basement was due to be redone. My wife Judy said "Since you persist in spending much of your spare time in the basement building your castles, why don't we redecorate with your hobby in mind." Needless to say, I was both flabbergasted and delighted with the opportunity. I immediately began the redesign, with the computer to be moved from the playroom to the larger rec room. Boxes and stacks of plans and hundreds of photographs would need filing space.
|
|
|
|
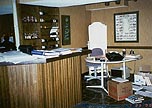
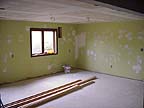
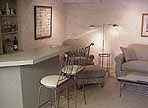
3. Out with the old...and in with the new! We pretty much wiped the slate clean, not only in the recreation room, but in the playroom, laundry/sewing room and 1/2 bath as well. The dark oak cabinets and shelves, with its fold-down slot car track was torn out. Out went the carpet (which was dark and hard to see Lego bricks on), wallpaper, wainscoating, etc. Two Tiffany hanging lamps were replaced by three fluorescent "clouds". The oak bar was covered in 15" square Lego bases, for continuity as well as Lego art possibilities.
|
|

|

|
|
|
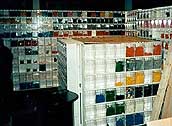
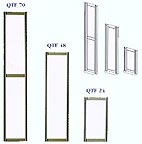
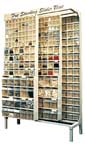
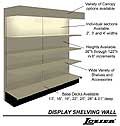
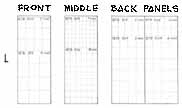
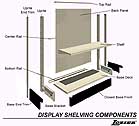
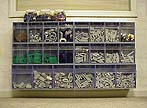
4. And how will I store my Legos? The big problem was what to do with what I guessed were several hundred thousand Lego bricks. I made requests on Lugnet and rec.toys.lego for storage suggestions -- and received a considerable number of responses from other Lego lovers, including a picture taken at the MIT Media Lab [see right], showing stacks of clear plastic storage bins! I went out on the internet looking for such units and soon came across Quantum Storage Systems in Miami, Florida [http://www.quantumstorage.com/quantum/tob5.htm]. Their tip-out bin units were 24" long and came in various sizes. They recommended a Double Slider Frame to be mounted on a Gondola made by Lozier Corporation [http://www.lozier.com/products_frames.htm]. They recommended a dealer in nearby Pekin, Illinois, and then it was a matter of ordering and waiting anxiously for everything to arrive.
|
|
|

|
|
|
|
|
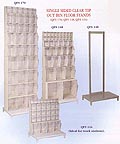
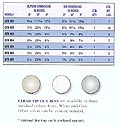
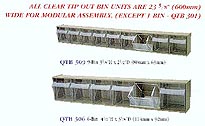
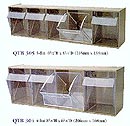
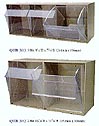
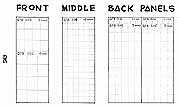
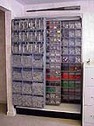
5. Selecting the bins. The next problem was to select the sizes of Quantum tip-out bins. I knew I had eight 2' by 6' racks on which to afix the bins units, but how many of each to buy...I measured the approximate volume each of my hundreds of containers, calculating about how many large bins I would need for voluminous items versus smaller bins for rarer parts. The useful sizes are seen below. I finally designed two storage systems containing 419 separate tip-out bins. The QTB 302 was too heavy filled to be used on the Slider Frame. There was a limit to the sizes of bin units on the back and the middle slider, due to the depth of the whole system and particularly the sliders, but the people at Quantum helped with that.
|
|
|
|
|
|
|
|
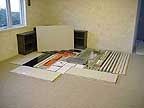
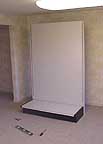
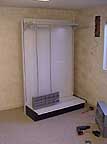
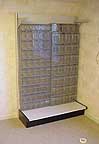
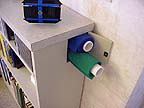
6. Setting up the storage system. The Quantum bin units and Slider Frames came in ivory, white and gray, and naturally the "gray" was the logical "stone" color. The Gondola came in a pretty gray called "silver", which went very well. The Lozier Gondola came from Omaha, Nebraska, the Slider Frames from Toronto, Canada and the dozens of boxes of Quantum tip-out bin units came from Miami - a real international effort. Once everything had arrived, I laid out the Gondola and Slider Frames parts. Then my spare time in the next couple of days was focused on assembling the two units.
|
|
|
|
|
|
|
|
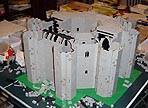
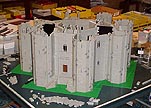
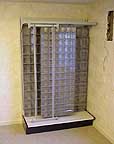
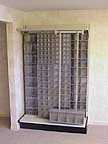
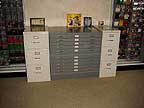
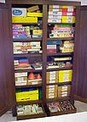
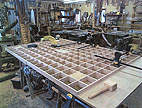
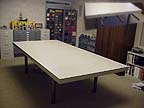
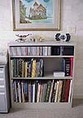
7. And everything just came together. Finally, the storage system assembled, the Legos are brought out of storage and the new Quantum units are filled! What fun. Some old Lego boxes are retained for plates, bases, horses and other parts not suitable for bins. Finally the ponderous 3" thick table I had made arrives, 88" long and 58" wide, with two leaves. Bookcases are built around the computer corner for books, castle guidebooks, notebooks, CD-ROMs, etc. Now its time to start designing and building castles again!!
|
|
|
|
|
|

|
|
|
|
All Lego castles created by Robert Carney.
